


The Chicken Jerky Recipe That Fixes the One Step Most Home Cooks Skip
Homemade jerky is only truly safer than store-bought if you heat-treat the poultry. Here's why that step matters, and a dog-safe recipe built around it.

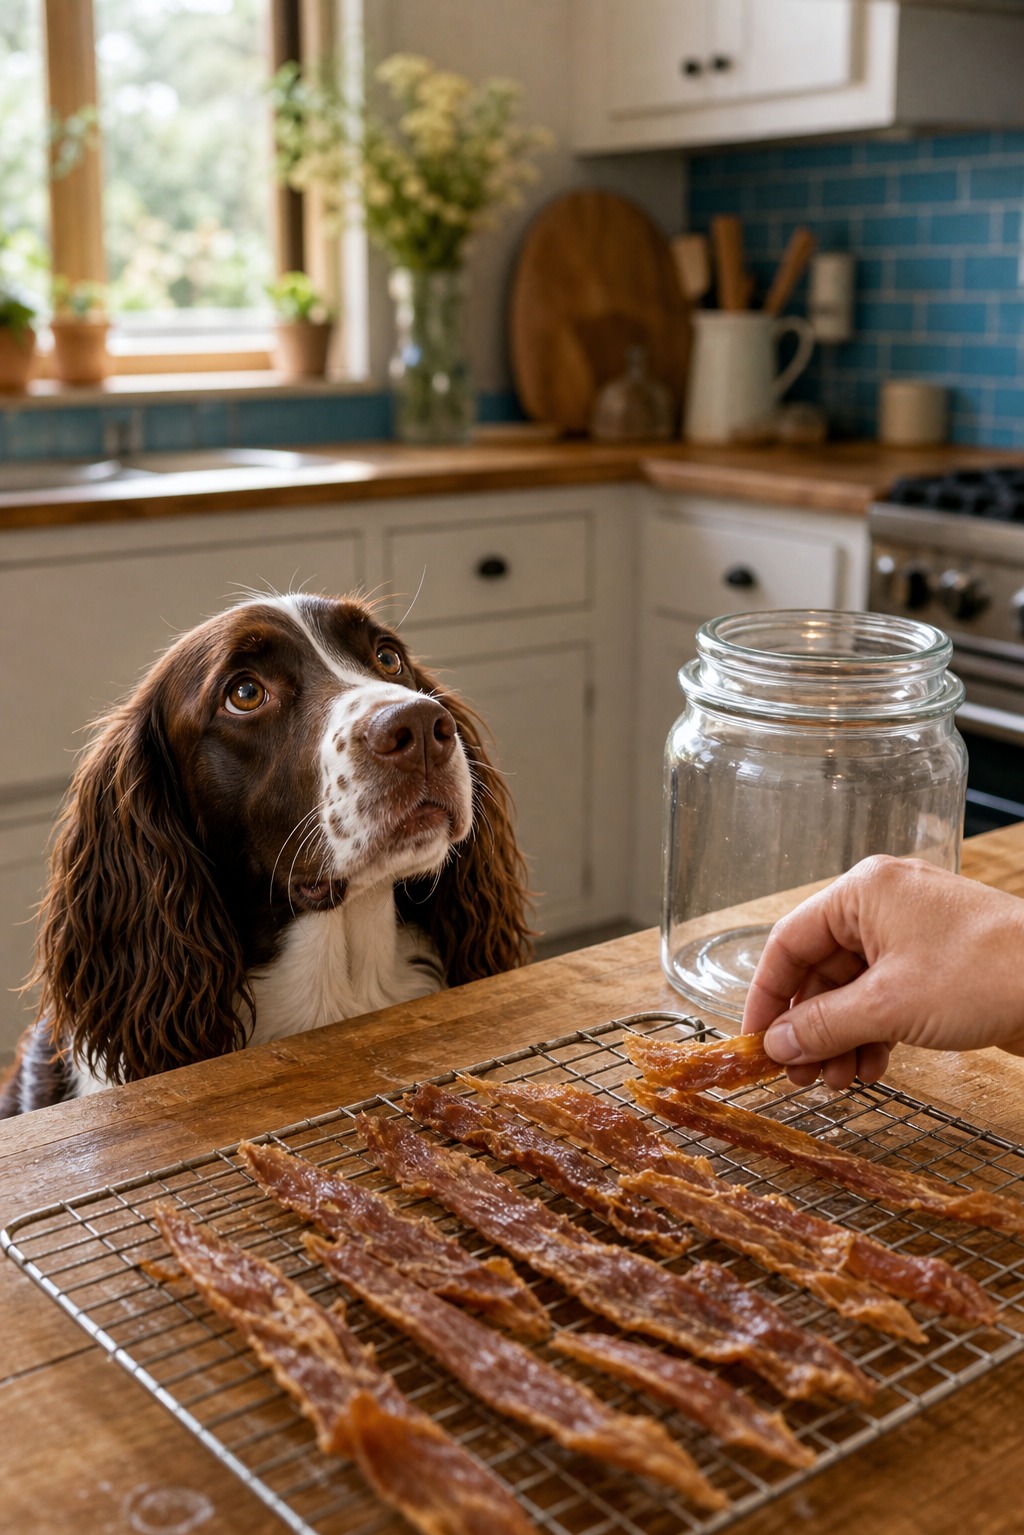
Making chicken jerky at home has a reputation as the safe, wholesome alternative to the store-bought kind, and mostly it deserves it. You control every ingredient, the list is one word long, and it is cheaper than the bag. But there is a quiet flaw in almost every home jerky recipe floating around, including the one this article used to run: they dehydrate raw chicken at a low temperature and never actually kill the bacteria in it. That turns “homemade is safer” into a half-truth. Fix that one step, and homemade jerky becomes genuinely safer than the alternative instead of just cheaper. This recipe is built around the fix.
Why the safety step is the whole point
The reason to make your own jerky in the first place is a sobering piece of history. Starting around 2007, the FDA began fielding reports of dogs falling ill after eating commercial jerky treats. The complaints kept climbing. By the end of 2015, the agency had logged roughly 5,200 complaints tied to chicken, duck, or sweet-potato jerky, involving more than 6,200 dogs and, most alarmingly, more than 1,140 dog deaths. The vast majority of the implicated products were sourced from China, and despite years of testing, the FDA never conclusively pinned down a single cause. Complaint numbers eventually fell after manufacturers shifted toward domestic sourcing and tighter controls, but the episode is exactly why people started slicing and drying chicken at home: to erase the opaque overseas supply chain entirely.
Here is the catch that makes the safety step non-negotiable. When you make jerky at home you solve the supply-chain problem, but you can accidentally create a different one. Dehydrators run low and slow, often around 140°F, which dries meat beautifully but does not necessarily reach the temperature that kills pathogens. Underdone poultry jerky can harbor Salmonella, which is a risk to your dog and to everyone in the household handling it. Poultry needs to reach an internal temperature of 165°F to be safe, and low-temp dehydrating alone may never get there.
Homemade treats let you control quality, but they do not sterilize the meat by default. Dehydrating at low heat dries chicken without necessarily killing bacteria, so I tell clients to heat-treat the poultry to 165 degrees at some point in the process. Do that, and you have genuinely safer jerky. Skip it, and you have just moved the risk into your own kitchen.
The fix: heat-treat, then dry
You have two clean ways to hit 165°F. Precook the strips in the oven first (bake at 275°F until they reach temperature on a meat thermometer), then dehydrate them to finish the texture. Or dehydrate first for the chew you want, then bump the dried strips into a 275°F oven for about 10 minutes to finish them off with a real kill step. Either order works. What does not work is dehydrating alone and calling it done. This single habit is what separates jerky that is actually safe from jerky that just looks the part.
Is chicken jerky even good for dogs?
Yes, within reason. Chicken shows up in plenty of commercial dog foods for good reason: unless your dog has a chicken allergy, it is a solid source of protein plus niacin, selenium, and phosphorus. Treats should still stay treats, though. If your dog is watching their weight, plain cooked or raw veggies make a great low-calorie alternative that carries the same “I made this for you” affection without the calories.
The recipe
Before you start, grab a very sharp knife and a meat thermometer, the thermometer is not optional here. Partially frozen meat slices more easily, and thinner strips dry faster. One note: this is made for dogs and is not meant for human snacking.
Ingredients
- 1/2 pound boneless, skinless chicken breast tenders
- 1/2 cup vegetable oil
- Dog-friendly seasonings of your choice: parsley, rosemary, or sage (fresh and very finely chopped is best; no onion or garlic)
Directions
- Rinse the chicken and remove any fat, which slows drying and shortens shelf life.
- Slice into strips about 1/8 to 1/4 inch thick. Slicing with the grain gives chewier jerky.
- Lightly coat the strips with oil and your seasonings.
- Arrange them on the dehydrator tray, evenly spaced and not touching, so air moves freely between them.
- Dehydrate at 140°F for 3 to 12 hours depending on thickness and your machine.
- Hit the kill step: either precook the strips to 165°F before drying, or finish the dried jerky at 275°F for about 10 minutes.
How to tell when it’s dried right
A dedicated dehydrator is far more efficient and hands-off than an oven for the drying stage. Because dry times vary so much, check often. After the first hour, start checking hourly: pull a strip, slice into it, and look at the inside. It is done when there is no visible moisture and the color is uniform all the way through. If it needs more time, return it and check every half hour as it nears the finish.
Storing it safely
Cool the jerky completely, then store it in airtight containers, zip-top bags work well, and keep them in the refrigerator to extend shelf life. A few basic food-safety habits round it out: use fresh chicken, keep prep surfaces and hands clean to avoid cross-contamination, and never leave finished jerky at room temperature for long stretches. Do the heat step, store it cold, and you have exactly what people hoped homemade jerky would be: a clean, one-ingredient treat that is safer than the bag, not just cheaper than it.
References
- U.S. Food and Drug Administration. “FDA Investigates Animal Illnesses Linked to Jerky Pet Treats.” fda.gov
- U.S. Department of Agriculture, Food Safety and Inspection Service. “Jerky and Food Safety.” fsis.usda.gov
- U.S. Food and Drug Administration. “Get the Facts! Jerky Pet Treats.” fda.gov
Not a substitute for your vet. Our guidance is educational. For urgent symptoms, contact a vet or emergency clinic right away. Editorial standards
Dr. Kohl is a board-certified veterinary dentist with a particular interest in preventive oral care. She reviews all dental health content at The Pet Times and contributes practical guides on home dental routines, professional cleaning, and oral disease prevention.
Meet our experts ↗Keep reading
 Food6 Ingredients, One Sitcom's Worth of Time: The Dog Cookie Worth Turning the Oven On ForDr. Mara Chen · 5 min
 FoodThis 3-Ingredient Dog Treat Is Foolproof. One Wrong Jar Makes It Deadly.Dr. Ravi Mehta · 5 min
 FoodThe Dog-Treat Aisle Is a Racket. Bake These Banana-Oat Bites Instead.Dr. Priya Nair · 4 min
 Food5 Reasons to Cook for Your Dog. Just Don't Cook All of It.Dr. Priya Nair · 6 min
 FoodYour Meatloaf Could Hospitalize Your Dog. This One Won't.Dr. Lena Park · 7 min
 Food40 Homemade Dog Biscuits, 5 Ingredients, One Rule About Peanut ButterDr. Mara Chen · 5 min